MOULDING
INSTALLATION
-
Make marks from the floor
to the upper edge of the product.
-
Using chalkline connect the marks
along the perimeter of the room.
-
Using angle finder measure the angle
of the corner of the room.
-
Set the angle on the trimming saw,
make a cut on the product.
In rooms with 90° corners it is possible
to use a mitre box and a hand saw.
-
Apply «Evroplast Assembly» adhesive on the mounting
surface or «Evroplast Multipurpose» adhesive
along the length of the product. The thickness
of the applied layer of adhesive shall be 3-5 mm.
-
Affix the product to the place of installation according
to the marking on the wall. Press the product
along the whole length so that adhesive exudes
from under the whole junction surface.
-
Immediately after attaching remove
excess adhesive using putty knife.
-
If necessary wipe the area of junction between
the product and the wall with a cloth wetted
with water if using «Evroplast Assembly»
adhesive; with acetone if using «Evroplast
Multipurpose» adhesive.
-
If using «Evroplast Assembly» adhesive it is
necessary to hold it with finishing nails
hammered under the product to prevent
the product from sliding. The nails
are removed after 24 hours.
-
If using «Evroplast Multipurpose» adhesive
additional fixation with nails is not required.
-
For products of more than 100 mm height,
additional fixation with self-tapping screws
at a spacing of about 600 mm is required.
-
Cut the next product. Check the joining
of the pattern and the profile of products,
if necessary redo the cut.
-
Wipe the end surfaces of abutting products with wet
cloth to remove dust and other contaminants.
-
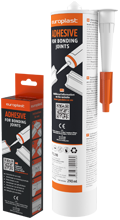
Apply «Evroplast for bonding joints»
adhesive on the end surface of already
mounted product.
-
Apply «Evroplast Assembly» or «Evroplast
Multipurpose» adhesive on the mounting
surface of the next product.
-
Press the product to the wall so that adhesive
exudes from under the whole surface of junction.
While moving the product along the wall,
push it to the adjacent product so that
adhesive exudes from the joint.
-
Immediately after attaching, remove excess
adhesive using putty knife.
-
Wipe the joint with cloth wetted with acetone.

-
Continue mounting the next product.

-
After 3 hours sand the joints with fine sandpaper.

-
Fill the sanded joints with fine-grained,
water-soluble filler for interior works, if necessary
repeat step 20 until you get a flat surface.
-
Fill the joint of the product to the wall
with adhesive in those areas
where no adhesive exuded.
-
Wipe the excess adhesive with a cloth wetted
with water if using «Evroplast Assembly»
adhesive; with acetone if using
«Evroplast Multipurpose» adhesive.
-
Paint the products, following directions
from the paint manufacturer, starting
from the corner of the room.
-
View:
- 1 - 8
- 9 - 16
- 17 - 24
- All


